AutoCAD ZOOM Command
ZOOM Command Access
COMMAND LINE: ZOOM

DEFAULT KEYBOARD SHORTCUT: Z
RIBBON: NAVIGATION BAR | NAVIGATION WHEEL
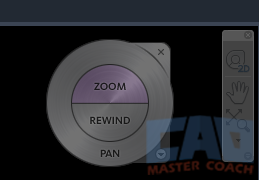
Introduction to AutoCAD ZOOM
Use the AutoCAD ZOOM Command to Move Closer and Further from Drawing Objects.
There are three primary ways to use the ZOOM command. ZOOM can be used from the Command Line, the Navigation Bar, or the wheel on your mouse if you are using a mouse with a wheel between the two mouse buttons.
1. Using ZOOM from the Command Line
When Zoom is initiated at the Command Line, nine options are available.

1.1 All
Zoom to the Limits of the Model Space if ZOOM is being done in Model Space or Zoom to the Limits of the Paper Space if ZOOM is being done in a Paper Space. ZOOM | All may include some empty space if the drawing objects do not fill the defined Limits of the current Model Space or Paper Space. If an object is outside of the defined Limits of the current space, then all objects will be shown, even those that are outside of the defined Limits.
1.2 Center
Zooms to a view defined by a center point and a scale. When selecting ZOOM | Center, AutoCAD first asks for the center point which can be entered at the command line or by picking a point on the screen. Next a magnification scale must be entered, lower values zoom it, or increase the magnification, and higher values zoom out, or decrease the magnification.
1.3 Dynamic
ZOOM | Dynamic is a powerful way to quickly pan and zoom to a new view in the drawing in one command. When Dynamic is selected, the screen is zoomed out to the limits of the current space and three rectangles are shown. The blue rectangle is the limits of the current space (note, the blue box is difficult to see in the image below however the drawing is zoomed to the drawing limits), the green rectangle shows the view at the beginning of the ZOOM command, and the white rectangle with an X in the center is where you can zoom / pan to for a new view. The white rectangle moves with the mouse and the X at the center is the location of the mouse cursor.
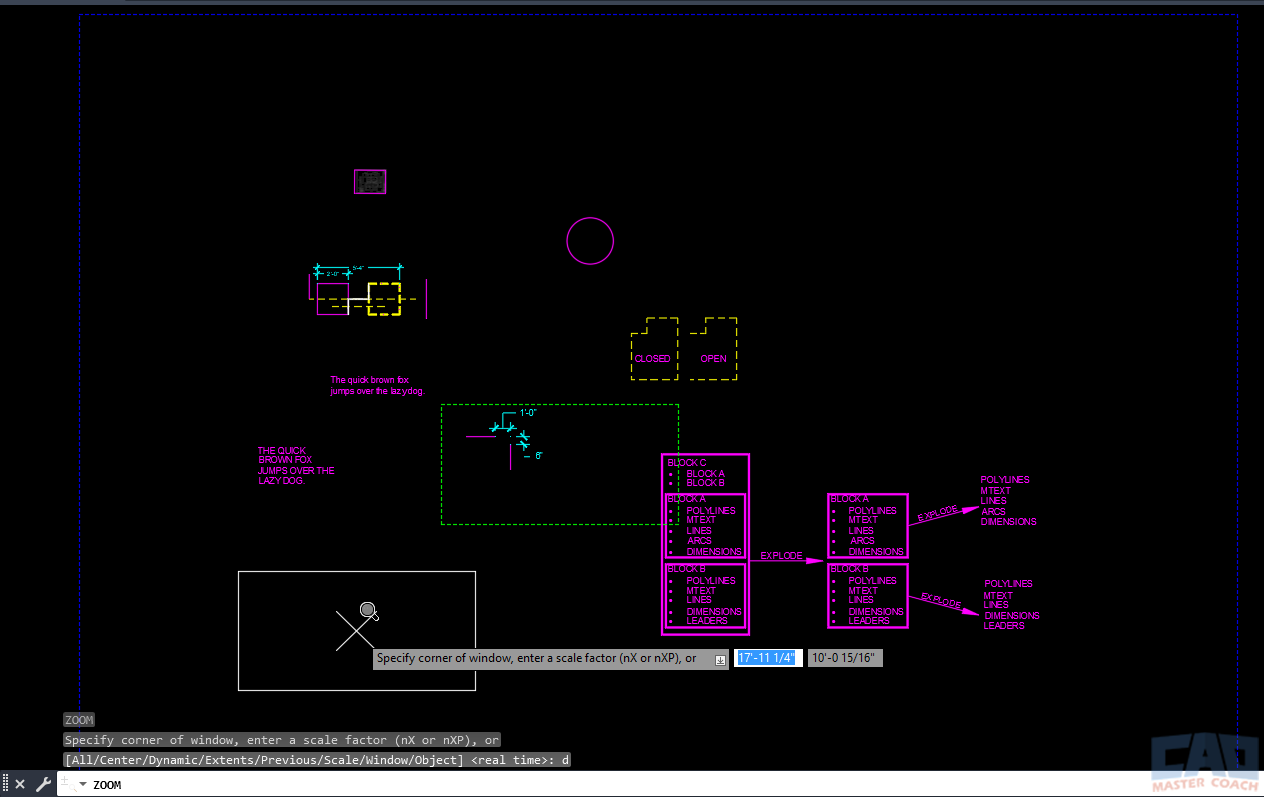
Next, select the location to place the center of the white box at the desired location of the new zoom area and left-click on the mouse. When the area is selected, the X in the center of the box changes to an arrow at the right side of the box which can be used to change the size of the box by moving the mouse, which defines the new Zoom area.
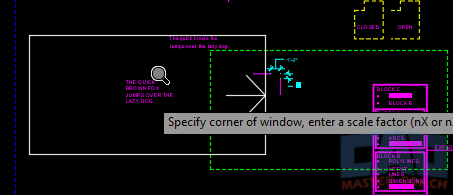
Left click on the mouse to select a new box size, then the box changes back to having an X at the center which can be moved around.
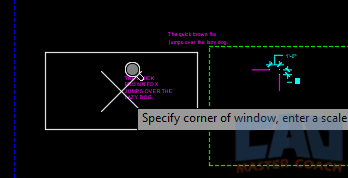
By left clicking the mouse, the box will switch back and forth between having the X at the center to move the box and the arrow at the right to resize the box. Exit the ZOOM command by pressing the ENTER key.
1.4 Extents
Zoom out to the Extents so all objects are shown in the current Model Space or Paper Space.
1.5 Previous
Zoom to the Previous Zoom view.
1.6 Scale
Zoom to an exact scale in the current view. After selecting Scale, enter a number then either X or XP. Use X when in Model Space and use XP in Paper Space. Numbers smaller than one will zoom in and numbers larger than one will Zoom out.
In Model Space, 2X will zoom in to make what is displayed 2X their current size, and 0.5X will zoom out to make the objects on the screen half their current size.
In Paper Space, 2XP will zoom in to make the view two times the scale of the Paper Space units, and 0.5XP will zoom to make the view one-half the scale of the Paper Space units.
1.7 Window
Zoom to a window selected during the command. After selecting Window, pick one corner of the window.

After selecting the first corner of the window, pick the opposite corner.
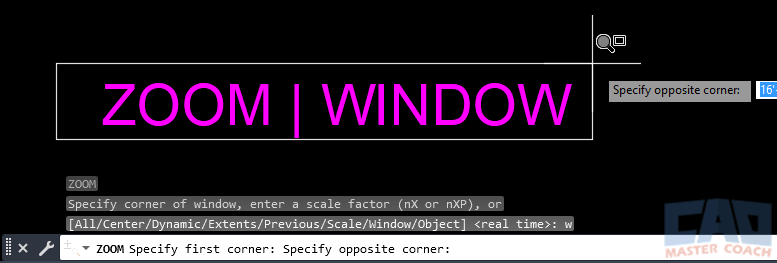
After the opposite corner is selected, the view will zoom so all objects in the selected window will take up as much of the screen as possible.
1.8 Object
Select Object to zoom into a particular object for the screen to zoom to. More than one object can be selected, and the screen will zoom to a view that will fill the screen with the selected objects.
1.9 Real Time
ZOOM | Real Time allows you to change the zoom level real time when the mouse is being moved. After initiating the Real Time option, a magnifying glass icon appears near the cross hair cursor.

Left click on the mouse and move it up to zoom in. When moving the mouse up, a + sign appears next to the magnifying glass to indicate the screen is being zoomed in.

Left click on the mouse and move it down to zoom out. When moving the mouse down, a - sign appears next to the magnifying glass to indicate the screen is being zoomed out.

2. Using ZOOM from Navigation Bar
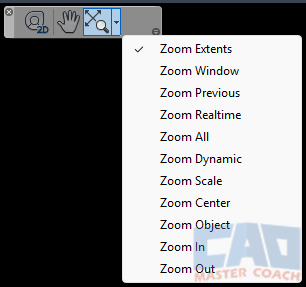
ZOOM is not on any ribbon menu on the ribbon bar. In the image below, ZOOM is accessed in the Navigation Wheel, which is accessed from the Navigation Bar. The Navigation Bar contains a Steering Wheel, as shown below, a Pan button and a Zoom pull down.

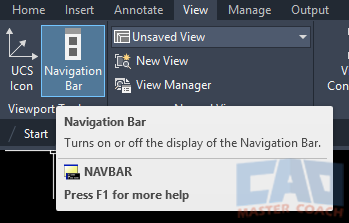
The Navigation Bar can be accessed from the command line or the View Ribbon as shown below.
NAVIGATION BAR COMMAND LINE: NAVBAR

NAVIGATION BAR RIBBON: VIEW RIBBON | VIEWPORT TOOLS | NAVIGATION BAR
To use ZOOM from the Navigation Bar, select the pull-down arrow at the right size of the Zoom button with the crossed arrows and magnifying glass. A menu of several zoom options appears in the menu. All options are described in the command line section and there are two more options. Zoom In and Zoom Out are added to this pull-down menu.
The two new options simply zoom in and zoom out with the center of the screen as the base point of the zoom operation.
When a Zoom option is used, it will remain as the default option for the Zoom button until a new zoom option is chosen.
3. Using ZOOM from the Mouse Wheel
If the mouse you are using has a wheel between the two buttons at the top of the mouse, then possibly the easiest way to ZOOM is with the mouse wheel. Rolling the mouse wheel up will Zoom in and rolling the mouse wheel down will Zoom out.
When zooming in and out with the mouse wheel, the center of the zoom action at the crosshair cursor. To Zoom in on a section of the drawing, move the crosshair over the section of the drawing you want to zoom in on and scroll the mouse wheel up.
There are two system variables that control the mouse wheel Zoom action:
3.1 ZOOMFACTOR
Controls how much the mouse wheel zooms in and out as the wheel is rolled up and down. Lower values will cause smaller zoom actions and larger values will cause higher zoom actions. The default value is 60.

3.2 ZOOMWHEEL
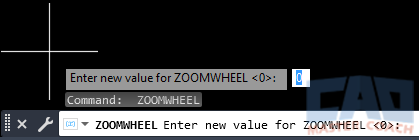
Controls the direction of Zoom when scrolling the mouse wheel up and down. Setting ZOOMWHEEL to 0 will zoom in when the mouse wheel is rolled up and zoom out when the mouse wheel is rolled down. Setting ZOOMWHEEL to 1 will zoom out when the mouse wheel is rolled up and zoom in when the mouse wheel is rolled down. The initial value is 0.
PAN and ZOOM can both be used with the mouse wheel, PAN by holding the wheel down and ZOOM by scrolling the mouse wheel up and down. PAN and ZOOM can also be used simultaneously in a single click of the mouse wheel by holding the wheel down and scrolling at the same time.
