AutoCAD ARC Command
ARC Command Access
COMMAND LINE: ARC

DEFAULT KEYBOARD SHORTCUT: A
RIBBON: HOME | DRAW TAB | ARC
Drawing Methods with AutoCAD ARC Command
An arc is a portion of the circumference of a circle, or a continuous portion of a curved line. Arcs often connect ends of lines with a curve between them.
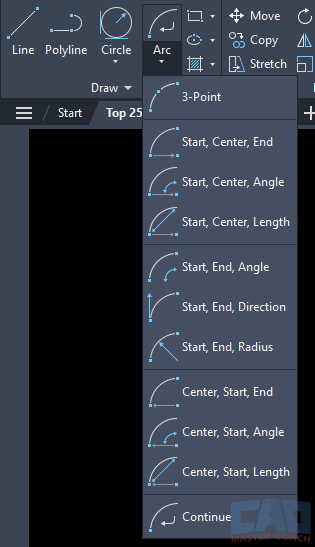
Simple arcs can be initiated from the command line. The command ribbon provides ten methods to draw an arc in a pull-down menu.
1. 3-Point
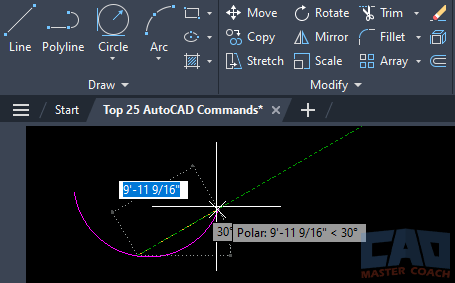
Initiate the ARC command in 3-Point mode, then enter three points the arc will pass through. The first point is the beginning of the arc, the second point is a point the arc will pass through, and the third point is the end of the arc.
2. Start, Center, End
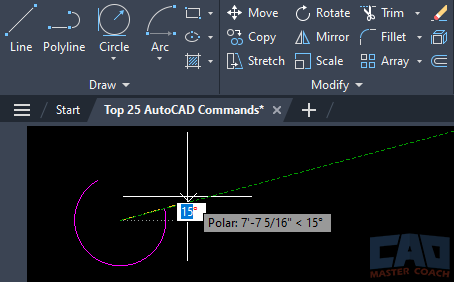
Initiate the ARC command in Start Center End mode, then enter three points the arc will pass through. The first point is the beginning of the arc, the second point is the center if the arc length, and the third point is the end of the arc.
3. Start, Center, Angle
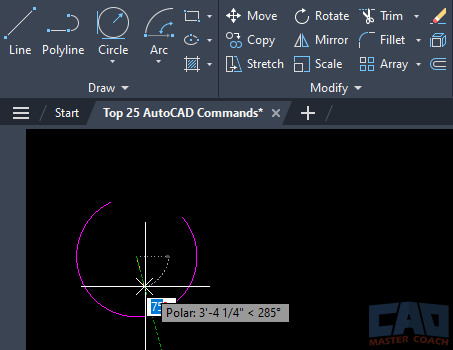
Initiate the ARC command in Start Center Angle mode, then select the start of the arc, the center of the arc, and the angle of the arc.
4. Start, Center, Length
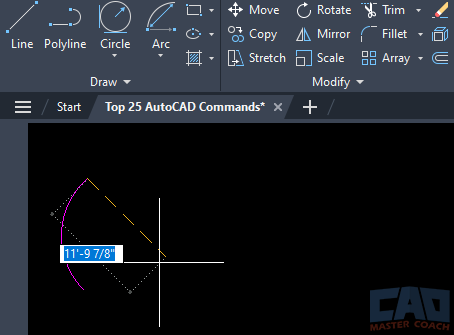
Initiate the ARC command in Start Center Length mode then select the start point of the arc, the center of the arc, and the length of the arc.
5. Start, End, Angle
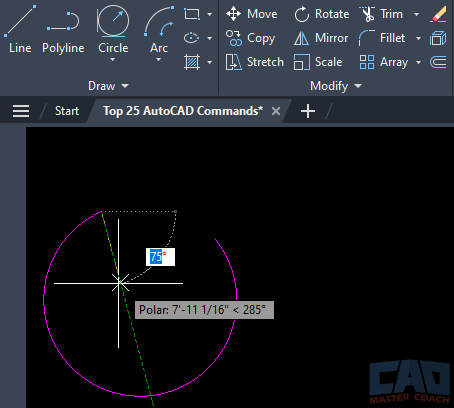
Initiate the ARC command in Start End Angle mode, then enter the start point of the arc, the end point of the arc, then the angle the arc will complete.
6. Start, End, Direction
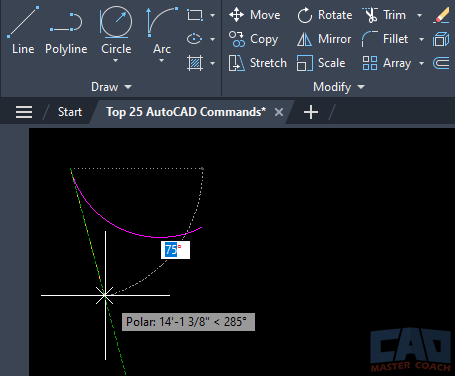
Initiate the ARC command in Start End Direction mode, then enter the start point of the arc, the end point of the arc, then direction of the arc.
7. Start, End, Radius
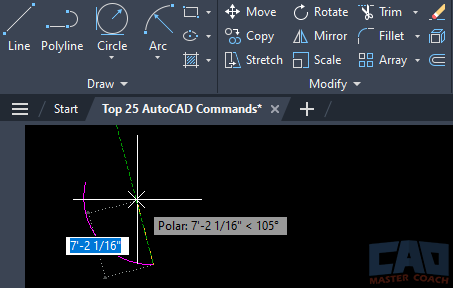
Initiate the ARC command in Start End Radius mode and enter the start point of the arc, the end point of the arc, and the radius of the arc.
8. Center, Start, End
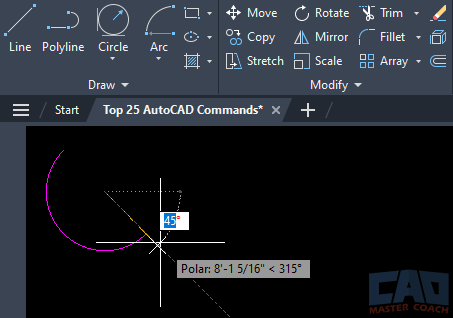
Initiate the ARC command in Center Start End Mode, then pick the center of the arc, the start point of the arc, then the end point of the arc.
9. Center, Start, Angle
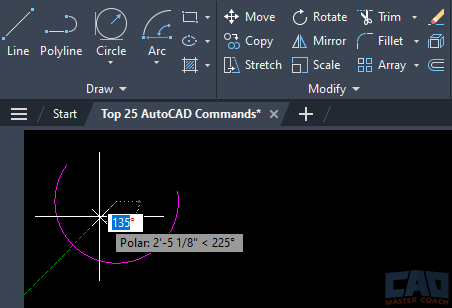
Initiate the ARC command in Center Start Angle mode then pick the center of the arc, the start point of the arc, then the angle the arc will sweep.
10. Center, Start, Length
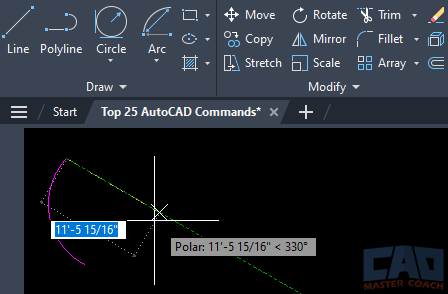
Initiate the ARC command in Center Start Length mode, then pick the center of the arc, the start point of the arc, then enter the length of the arc.
Arc Frequently Asked Questions (FAQs)
The ARC command is used to draw curved segments of circles. It supports multiple input methods so you can define an arc by its radius, endpoints, included angle, tangent conditions, or length, depending on your design needs.
For most beginners, Radius and 3-Point are the best starting methods. Use Radius when you know the curvature you need. Use 3-Point when geometry or snapping drives the start, a point along the arc, and the end.
Some older variants are rarely used, but the core methods like Center-Start-End, 3-Point, Radius, and Tangent-based options are still very relevant. Focus on the methods that match how you actually design—smooth transitions, known radii, or snapping between existing geometry.
Think about what you know up front. If you know a radius and one or two key points, use the Radius or Center-based methods. If you’re fitting an arc between existing lines, try the Tangent or 3-Point options. For regulated curve lengths, choose a length-driven method.
Yes. Many workflows mix LINE and ARC. You can draw a framework with LINE, then add arcs using tangent or endpoint snaps. You can also convert segments to polylines so line and arc pieces edit together as one continuous object.

