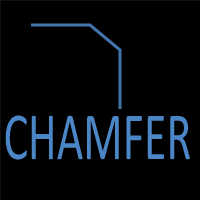
AutoCAD CHAMFER Command
CHAMFER Command Access
COMMAND LINE: CHAMFER

DEFAULT KEYBOARD SHORTCUT: CHA
RIBBON: HOME | MODIFY TAB | CHAMFER

How to Use The AutoCAD CHAMFER Command
The AutoCAD CHAMFER command is used to connect two drawing objects with a LINE between them.
Both CHAMFER and FILLET are used to connect drawing objects. CHAMFER connects drawing objects with an angled line between them. FILLET connects drawing objects with an arc between them. The two objects you are connecting do not necessarily need to have a common intersection to use either command, they only need to have an implied intersection to use the FILLET or CHAMFER commands.
On the Ribbon, CHAMFER and FILLET are at the same pull-down menu. When one of these commands is initiated from the Ribbon, the button at the pull-down will show the last command that was used.
When the CHAMFER command is initiated, two important pieces of information are given that describe how the command will behave, and seven options to change how the command will connect the objects are given.
The first thing to notice is the two pieces of information; the Mode and the Current chamfer distances that will be used. If you want to change either of these options, then press T to change the trimming mode or press D to change the chamfer distances that will be drawn when the two objects are connected. In this case, the Trimming Mode is set to TRIM and both Dist1 and Dist2 are set to 0’-3”.
The chamfer distance is the distance from the implied intersection of the two objects being chamfered that the chamfer line will be drawn. Dist1 is the distance from the implied intersection for the first object that is chosen and Dist2 is the distance from the implied intersection for the second object. When both chamfer distances are set to zero (0), the objects are connected at a point and no chamfer is drawn.
Also note in the picture below, the horizontal distance from the right end of the horizontal line is 1’-0”, and the vertical distance from the top of the vertical line to the right end of the horizontal line is 0’-6”.

CHAMFER Options
1. Undo
After initiating the CHAMFER command, several options can be changed to modify the behavior of the command. Selecting Undo will reverse all of the modifications to the behavior of the command.
2. Polyline
The Polyline option will put the same beveled chamfer on every intersection of two objects of a Polyline. In this case, a chamfer will be put on all four corners of the magenta square.

3. Distance
The Distance option defines the distance from the implied intersection the chamfer line will be drawn. In this example, both Dist1 and Dist2 are 0’-3”.

4. Angle
By default, the chamfer angle is 45 degrees. This can be changed using the Angle option. When using the Angle option, two things must be specified. The first is the distance from the implied intersection to the point the chamfer begins on the first object selected. The second is the angle the chamfer line will be drawn, and that angle is measured from the second object that is selected.
In the example below, the distance from the implied intersection is 6”. Because the first object selected is the horizontal line, that line is extended to a point that is 0’-6” from the implied intersection of the two lines. Then, a line at an angle of 75 degrees is drawn to the point where it intersects with the vertical line. The 75 degrees is measured from the horizontal and rotates clockwise.

5. Trim
Trim mode sets whether the objects are trimmed or extended to meet the chamfer line that is drawn. When Trim mode is set to Trim, the objects are trimmed or extended as appropriate and connected to the chamfer line.
When Trim mode is set to No Trim, there are two conditions which might occur. In both conditions, the objects that are having the chamfer bevel line drawn will not be trimmed or extended. The first example is when one or both objects are not long enough to be connected to the chamfer line. The chamfer line will still be drawn, it just won’t be connected to the original objects as shown below.

In the second condition, one or both objects are longer than they need to be for the chamfer line. Neither object will be trimmed as shown below. The original lines are left intact, and the chamfer line is drawn with a Dist1 of 0’-4” and a Dist2 of 0’-4”. Note that one line is too short, and one line is too long. In both cases, neither line is trimmed or extended to the ends of the chamfer line, and the chamfer line is still drawn in the correct location with the ends of it 0’-4” from the implied intersection of the two lines that are being chamfered.

6. mEthod
The Method option designates how the chamfer line is drawn from the implied intersection of the objects being chamfered. Selecting Distance means the chamfer line will be defined by two distances. Selecting Angle means the chamfer line will be defined by a distance and an angle.

7. Multiple
By default, the CHAMFER command will prompt the user to select two objects to draw a chamfer between, and when the second object is selected, the chamfer is made and the command ends. When Multiple is selected, when one chamfer is finished another with the same command options can be done. This will continue until either the ENTER key or the ESC key is pressed.
Chamfer Distance Is Too Large Condition
If a chamfer is entered that is too large to be drawn between the two objects, whether the two distances are too large, or the distance and angle specified isn’t possible to draw a chamfer between them, AutoCAD will give an error that the Chamfer distance is too large.
As shown below, the chamfer distance entered for both Dist1 and Dist2 is 5’-0” and the distance between the closest point on both lines is less than that, so it is not possible to draw the chamfer bevel.

Frequently Asked Questions (FAQ)
CHAMFER creates a straight, beveled edge between two objects by trimming or extending them and inserting a straight line between the edges.
CHAMFER creates straight corners, while FILLET creates rounded corners using an arc and radius. Use CHAMFER when sharp or angled edges are required.
Distance mode trims or extends each object by a specified distance before creating the chamfer line. The distances are measured along the original objects, not along the chamfer itself.
Angle mode defines the chamfer direction by specifying an angle and one distance. This is useful when a specific slope or orientation is required.
AutoCAD extends geometry when needed to satisfy the specified chamfer distances or angle. This is normal behavior and depends on the current Trim setting.
Yes. CHAMFER permanently trims or extends objects. Use UNDO if you need to revert the change.
Yes. CHAMFER works efficiently on polylines and can bevel multiple corners in a single operation.
Yes. Distance, angle, and trim settings persist between uses until you change them.

All Commands
Command Categories

Create
Explore all AutoCAD Create commands in one place. Learn how to use LINE, CIRCLE, ARC, POLYLINE, BLOCK, HATCH, and more with tutorials and practical examples.

Modify
Your complete guide to AutoCAD Modify tools—ERASE, TRIM, EXTEND, MOVE, ROTATE, OFFSET, FILLET, and more—with tips and workflows.

Notation
Complete guide to annotation in AutoCAD: text, dimensions, leaders, tables, zoom/pan basics, and clipboard tools.

Drafting Aids
Learn AutoCAD’s Drafting Aids and Precision Controls—OSNAP, Ortho Mode, Polar Tracking, Object Snap Tracking, and Dynamic Input. Improve accuracy, speed, and control with this complete guide.

All Commands
Browse every AutoCAD command in one place with this complete A–Z index. Quickly find command pages for LINE, ERASE, ZOOM, and more, with clear explanations and tips for efficient drafting.
Modify Commands