STRETCH Command in AutoCAD
Stretch Command Access
COMMAND LINE:

DEFAULT KEYBOARD SHORTCUT: L
RIBBON: HOME | DRAW TAB | LINE
Introduction
The STRETCH command in AutoCAD is a powerful modification tool used to lengthen, shorten, or reshape geometry without redrawing objects from scratch. Unlike the MOVE command, which shifts entire objects, STRETCH modifies only the parts of objects captured in a crossing selection.
This makes it invaluable for design adjustments where geometry needs to be extended or compressed while keeping other areas fixed. For example, if you need to lengthen a wall in a floor plan or extend part of a rectangular boundary, STRETCH can accomplish the task in just a few clicks.
Selection Rules
The key concept of STRETCH is that it only works with crossing selections:
- Use a crossing window (green selection box) or crossing polygon.
- Only the portions of objects inside the crossing area will be modified.
- A normal window selection (blue) does not activate the STRETCH behavior.
This is often the first mistake users make — selecting with a regular window and wondering why nothing happens. Once you learn to use crossing selections, the command becomes predictable and extremely efficient.

Illustration of crossing selection versus normal window selection for the STRETCH command in AutoCAD.
Step-by-Step Example
Here’s a simple workflow for stretching a rectangle:
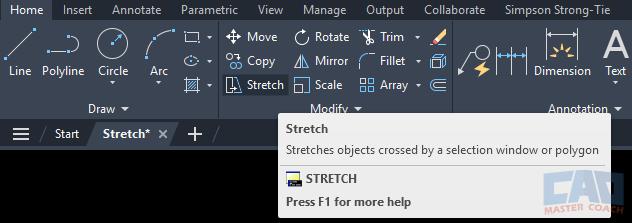
- Start the command: type S or click Stretch on the Modify panel.
- Create a crossing window that captures the right edge of the rectangle.
- Specify a base point (such as the lower-left corner).
- Specify a second point in the direction you want to stretch.
The rectangle’s right side moves outward, extending its length. The left side remains fixed, which saves you from having to redraw the geometry manually.
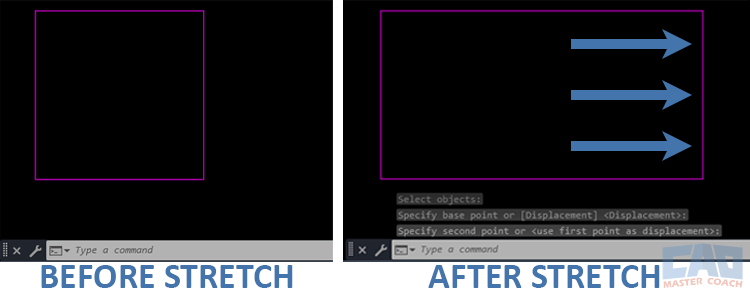
Example of a rectangle before and after being stretched with the STRETCH command in AutoCAD.
This workflow can be applied to complex objects too — like stretching part of a floor plan, adjusting multiple lines at once, or shifting endpoints in detail drawings.
What Can and Can’t Be Stretched
Not every object type responds to STRETCH.
STRETCH Works on:
- Lines
- Polylines (open or closed)
- Arcs
- Dimensions
STRETCH Does not work on:
- Circles
- Ellipses
- Text or Mtext objects
- Blocks (unless exploded)
If an object cannot be stretched, you may need to use grips or alternative commands like MOVE or LENGTHEN.
Practical Applications
The STRETCH command shines in real-world design work, where edits are frequent and speed matters. Common applications include:
- Architecture: Extending a wall to align with another design element, or shifting openings such as doors and windows.
- Civil engineering: Adjusting roadway alignments, curb lines, or lot boundaries when dimensions change.
- Mechanical design: Stretching plates, brackets, or cutouts to meet updated specifications.
- General drafting: Resizing rooms, extending partitions, or reconfiguring layouts without redrawing.
These scenarios demonstrate how STRETCH can save hours of editing by making quick, controlled changes.
Common Mistakes & Troubleshooting
Because of its unique selection rules, STRETCH is sometimes tricky for new users. Here are typical issues:
| Issue | Likely Cause | Solution |
|---|---|---|
| Nothing happens after selection | Used a normal window selection | Use a crossing window (green) or crossing polygon |
| Object moves instead of stretching | Entire object captured in crossing area | Adjust selection to include only part of the object |
| Endpoints don’t shift | Vertex not included in crossing selection | Enlarge the crossing window or use grips for precision |
| Can’t stretch certain objects | Circles, ellipses, text, or blocks | Use alternative commands or explode blocks first |
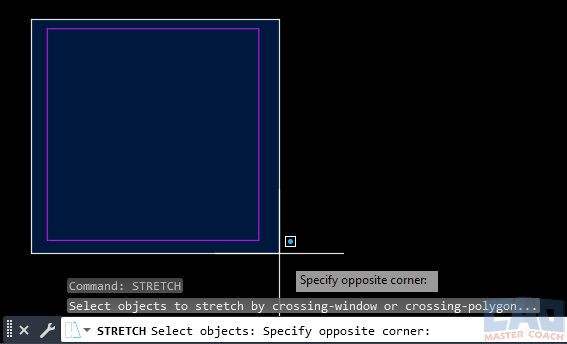
Diagram showing incorrect full-object selection versus correct partial crossing selection in AutoCAD STRETCH.
Keeping these tips in mind reduces frustration and ensures you get the result you expect.
Advanced STRETCH Tips
Once you’re comfortable with the basics, you can use STRETCH more strategically:
- Use with Object Snaps (OSNAP): Ensure stretched objects align precisely with existing geometry.
- Combine with Ortho or Polar Tracking: Lock stretch movements to exact angles (e.g., 90°, 45°).
- Layer control: Lock reference layers before stretching, so you only modify intended geometry.
- Hybrid approach with grips: Use STRETCH for bulk edits, then fine-tune details with grips for accuracy.
These techniques transform STRETCH from a basic tool into a precise editing method for professional drawings.
Best Practices
Use STRETCH when you need to adjust part of an object, not the entire element.
- Think of STRETCH as an “intelligent move” — only certain parts are affected.
- Pair it with MOVE, LENGTHEN, and SCALE to cover all geometric editing needs.
- Practice on simple geometry before applying STRETCH to large, complex projects.
FAQ About STRETCH
STRETCH moves selected endpoints/vertices while keeping the rest of the object fixed, letting you lengthen, shorten, or reshape geometry without redrawing.
STRETCH only works with crossing selections (green window or crossing polygon). A regular (blue) window doesn’t activate stretching behavior.
MOVE shifts entire objects. LENGTHEN adjusts a single object’s length. STRETCH modifies only the portion inside your crossing selection, changing shape/length while the rest stays put.
Create a crossing window/polygon that captures the endpoints/vertices you want to move. Everything with points inside the crossing area will stretch together.
Most likely you used a normal (blue) window or didn’t include the needed endpoints inside your crossing area. Try a crossing window and make it large enough to capture key vertices.
Yes. Turn on Ortho or use Polar Tracking to lock to set angles (e.g., 0°, 90°, 45°). Combine with OSNAPs to snap precisely to target points.
Standard blocks won’t stretch unless exploded (or if they’re dynamic blocks with stretch actions). Many dimensions will update when their associated geometry is stretched.
Make sure your crossing window includes only part of the object (its endpoints/vertices) rather than the entire object.
Yes—press Ctrl+Z (or type UNDO) immediately after the operation.
