AutoCAD ERASE Command: Complete Guide
ERASE Command Access
COMMAND LINE: ERASE

DEFAULT KEYBOARD SHORTCUT: E
RIBBON: HOME | MODIFY TAB | ERASE

How To Use the AutoCAD ERASE Command
The ERASE command is one of the simplest yet most essential tools in AutoCAD. As its name suggests, it allows you to delete unwanted geometry from your drawing. While it may seem straightforward—select an object and remove it—the ERASE command has a surprising amount of depth when you consider selection methods, workflow strategies, and productivity tips. In fact, understanding ERASE thoroughly is just as important as mastering
1. Command Overview
The ERASE command removes selected objects from your drawing. You can launch it in several ways:
- Command Line: Type ERASE or simply E and press Enter.
- Ribbon: Found on the Home tab, under the Modify panel.
- Right-Click Menu: Select an object, right-click, and choose Erase.
- Delete Key: After selecting objects, pressing the Delete key works the same way as ERASE.
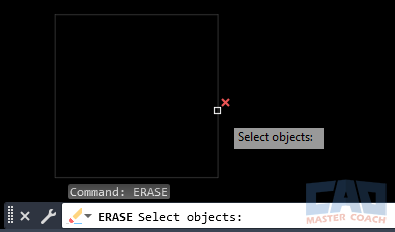
AutoCAD ERASE command example with object highlighted.
At first glance, all of these methods seem identical, but your choice often comes down to workflow habits. Command-line users might prefer the quick alias E, while mouse-driven users often stick to the Delete key.
2. Selecting Objects to Erase
The most important step in using ERASE is making accurate selections. AutoCAD provides many ways to select geometry:
- Pick Selection: Click on individual objects.
- Window Selection: Drag from left to right; only objects completely inside the rectangle are selected.
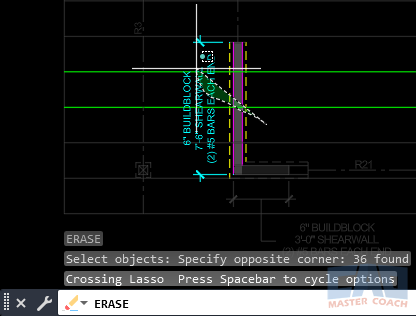
- Crossing Selection: Drag from right to left; objects that touch the rectangle boundary are also selected.
- Fence Selection: Draw a fence line across multiple objects.
- Previous: Reselects the last group of objects you worked with.
- All: Selects everything in the drawing (use carefully).
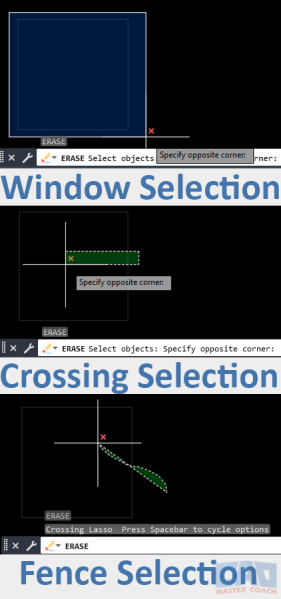
Selection methods for the AutoCAD ERASE command.
Each selection method is useful in different situations. For example, Window is safer for precise deletions, while Crossing is ideal for clearing large overlapping areas.
3. Confirming the Deletion
After making a selection, you confirm by pressing Enter or Spacebar. The objects immediately disappear from view, but they are not permanently gone until you save the drawing. If you erase something by mistake, you can quickly bring it back with the UNDO command (Ctrl + Z).
This flexibility is important: AutoCAD’s ERASE command is not destructive in the same way as deleting a file from your computer. You can always reverse it during your editing session.
4. Practical Applications
The ERASE command is woven into nearly every AutoCAD workflow. Here are some common scenarios:
- Removing Construction Geometry: Erase temporary lines, circles, or points used for layout.
- Cleaning Up Imports: Survey or consultant drawings often include excessive data; ERASE helps strip them down.

ERASE command simplifies and cleans up imported geometry.
- Correcting Mistakes: Accidentally drew a line in the wrong layer? ERASE it and redraw correctly.
- Simplifying a Drawing: Reducing clutter makes your file smaller and your plotting clearer.
In many offices, “cleaning the drawing” with ERASE is a regular part of CAD standards.
5. Time-Saving Tips
- Keyboard Alias: Use E instead of typing ERASE fully.
- Quick Select + ERASE: Combine with QSELECT to filter objects (for example, erase all circles on Layer 0).
- Erase Layered Geometry: Temporarily isolate a layer with LAYISO, then erase unwanted objects.
- Group Erase: Use selection sets to erase repetitive mistakes across the drawing.
Learning these combinations speeds up cleanup tasks and avoids tedious point-and-click deletion.
6. Common Mistakes
Even though ERASE is simple, users often run into pitfalls:
- Erasing More Than Intended: Using crossing windows without zooming in can delete important objects.
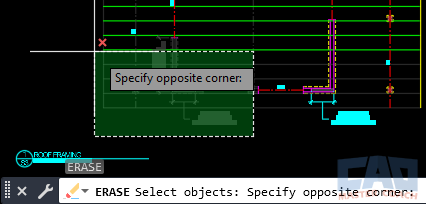
Accidental over-selection using ERASE in AutoCAD.
- Erasing Reference Geometry: Construction lines and guides may still be useful—consider putting them on a non-plot layer instead of erasing.
- Accidentally Selecting Hidden Objects: If you erase in a dense area, you might delete geometry stacked behind what you see.
- Deleting Instead of Hiding: Sometimes freezing or turning off a layer is a better choice than erasing objects.
Being mindful of these mistakes prevents rework and frustration.
ERASE vs. Other Modify Commands
While ERASE simply removes objects, several related tools provide alternative workflows:
- TRIM: Removes part of an object using cutting edges, rather than deleting the whole thing.
- BREAK: Splits geometry but doesn’t completely erase it.
- OVERKILL: Cleans duplicates or overlapping lines, often a smarter option than manually erasing.
- LAYDEL: Permanently deletes an entire layer and all geometry on it (use cautiously).
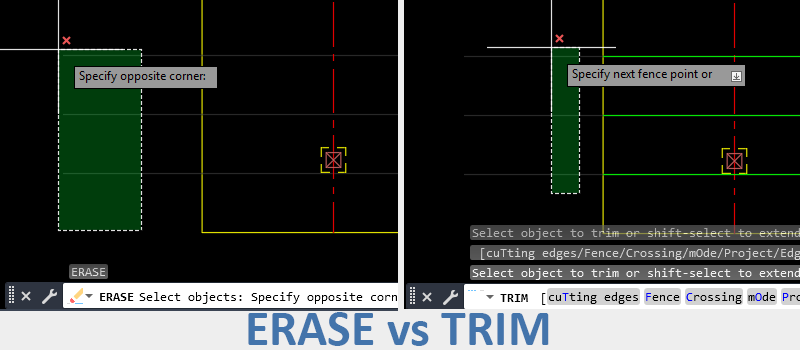
ERASE removes objects completely, while TRIM modifies them.
Choosing the right tool saves time and avoids mistakes.
8. Best Practices for Professionals
Professional CAD standards often emphasize drawing clarity and accuracy. When using ERASE:
- Zoom In: Always confirm selections before erasing.
- Work on Layers: Keep construction and temporary geometry on dedicated layers for easy cleanup.
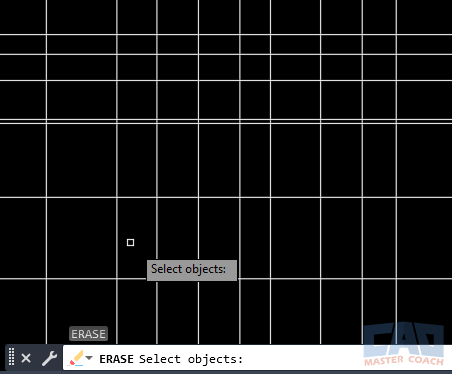
Put temporary geometry on its own layer for easier cleanup with ERASE.
- Audit Before Delivering: Use ERASE in combination with PURGE and AUDIT to deliver clean, professional files.
- Use Undo Wisely: Don’t be afraid to backtrack; undo is your safety net.
Consistent application of these habits makes your drawings more reliable and easier for others to work with.
9. Advanced Selection with ERASE
AutoCAD allows you to combine selection methods for more precise erasing:
- Start a crossing window, then hold Shift to remove objects from the selection.
- Use object filters (.LWPOLYLINE, .TEXT, etc.) at the command line for exact targeting.
- Type P for “previous” if you want to quickly erase the last selection you worked on.
Fence selection combined with Shift deselection provides precision when erasing.
With practice, these shortcuts save significant time in large, complex projects.
10. Conclusion
The ERASE command may be one of the simplest in AutoCAD, but it’s also one of the most indispensable. From quick corrections to full drawing cleanup, ERASE is always part of the workflow. By learning multiple selection methods, avoiding common mistakes, and combining ERASE with filtering or layer management tools, you gain more control and efficiency in your CAD work.
Whenever you work in AutoCAD, remember: a clean drawing is a professional drawing. ERASE is the first step toward that standard.
Frequently Asked Questions (FAQ)
The ERASE command permanently removes selected objects from a drawing. Once erased, the objects no longer exist unless restored using Undo.
You can start ERASE by typing ERASE or E at the command line, selecting it from the Modify panel, or pressing Delete after selecting objects.
Yes. ERASE removes objects from the drawing database. However, you can undo the action immediately using the UNDO command.
ERASE removes an entire object, while TRIM removes only a portion of an object based on cutting boundaries.
Yes. ERASE supports window, crossing, fence, and selection filters, allowing you to remove many objects in a single operation.
Objects on locked layers, external references, or certain constrained geometry cannot be erased until restrictions are removed.
Functionally, yes. Pressing Delete performs the same action as the ERASE command, but ERASE provides clearer command-line feedback and workflow control.
Erasing a block reference removes that instance only. Erasing grouped objects removes all selected members at once.
