How to Add a Custom Button to the AutoCAD Ribbon (CUI)
Introduction
What if AutoCAD has a command that you know exists, and there is not a button on the ribbon for it?
AutoCAD has many commands that are not shown on any menu on the ribbon. This tutorial will show you step-by-step how to find the command in the system menu and add it to the ribbon where you would like to place it.
The process to add the Qleader button to the ribbon will be demonstrated. Adding this button will make your computer looks like the images in the Qleader command description.
Step 1. Initiate the CUI command
The CUI command, which stands for Custom User Interface, can be activated in one of two ways. The first way is to enter CUI at the command line.

The second way to initiate the CUI command is at the ribbon.
MANAGE RIBBON | CUSTOMIZATION PANEL | USER INTERFACE
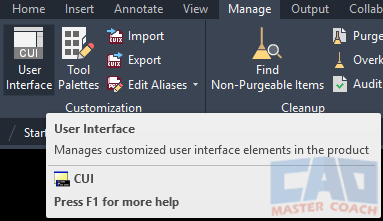
When the CUI command is initiated, the Customize User Interface window appears.
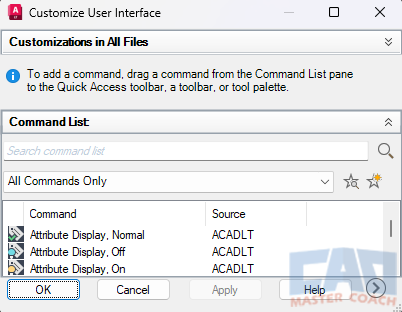
Step 2. Press The Arrow At The Lower Right
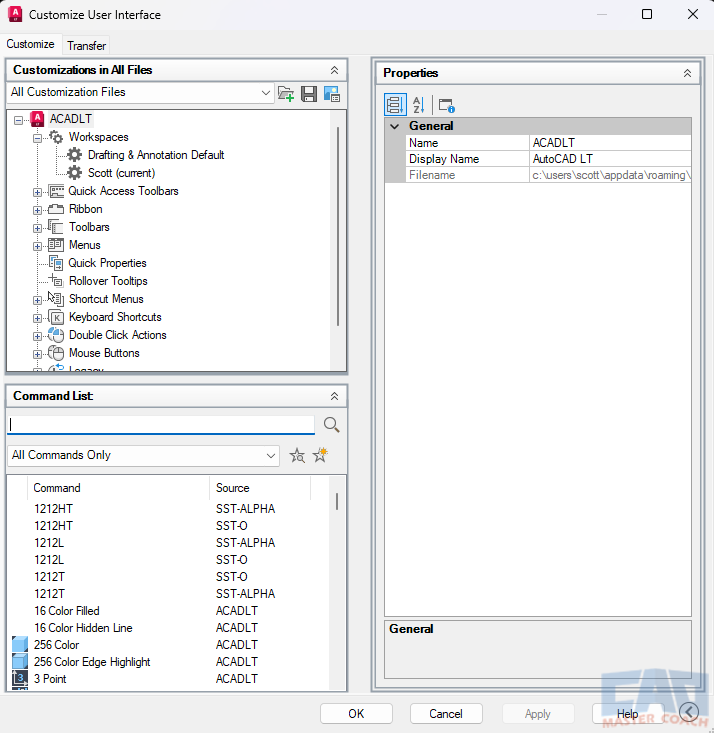
Press the arrow at the lower right to expand the window wider, use a window grip to make it larger, then ensure the Customize tab is selected, not the Transfer tab. Next, press the double down arrows in the Customizations in All Files, Command List, and Properties sections so all portions of the screen are opened and able to be easily accessed.
Opening all of the panels and making the window large enough to find the shortcut buttons to a desired location will make the process of dragging and dropping them to other parts of the window much easier.
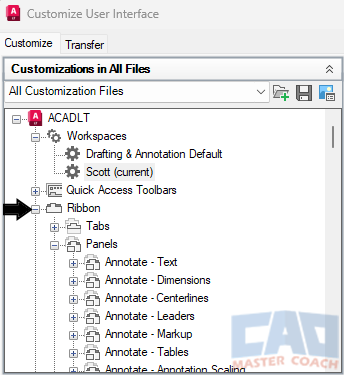
Step 3. Press The + Sign Next To Ribbon
In the Customization in All Files section, open the Ribbon section by pressing the + symbol next to it.
Get the Top 35 AutoCAD Commands for FREE
Step 4. Navigate To The Button Location
Navigate to Ribbon | Home – Annotation | Row 1
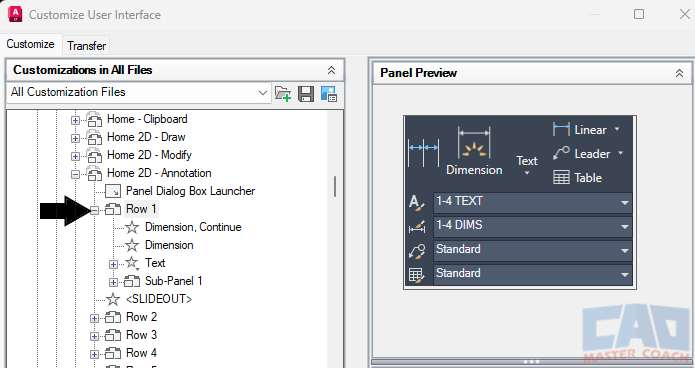
Note that at the right of the window, the Properties section changes to a Panel Preview and shows what the current state of the ribbon in that section looks like with the Qleader button not installed. The Dim Continue button is at the top left of the Ribbon Panel.
Step 5. Search For Command From The Command List
In the Command List section, search for dimension, leader. Then single click on the Dimension, Leader command in the area below the search box. The right side of the window transforms again and shows a preview of the button in the Button Image area and shows several properties of the shortcut in the Properties area. Confirm at the Macro line that the command will be ^C^C_qleader. Each ^C is the equivalent of pressing the ESC key in the macro language. Next, select the Large Image radio button in the Button Image area.
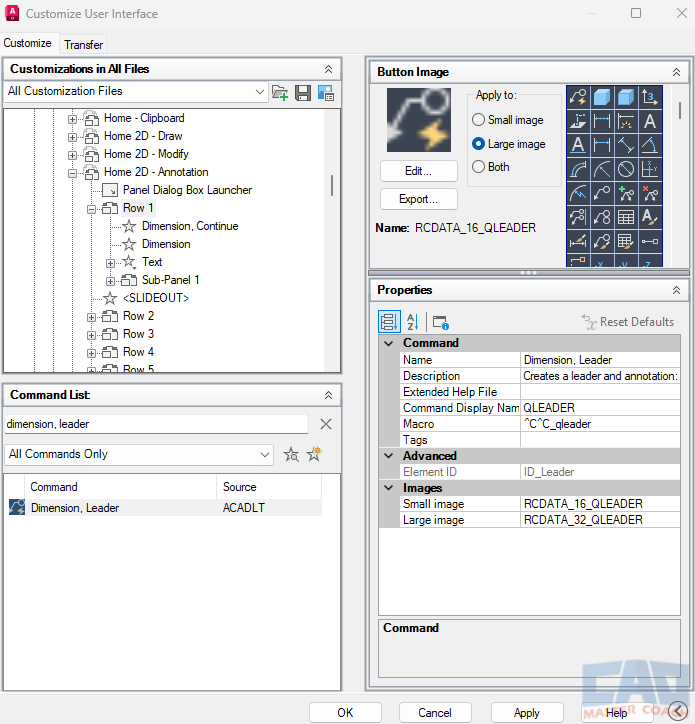
Step 6. Drag The Command To The Ribbon Location
Drag the Dimension, Leader command from the Command List area to the desired location in the Customization in All Files area. Once this has been dropped into the Customization in All Files section, the button will be active in the Ribbon.
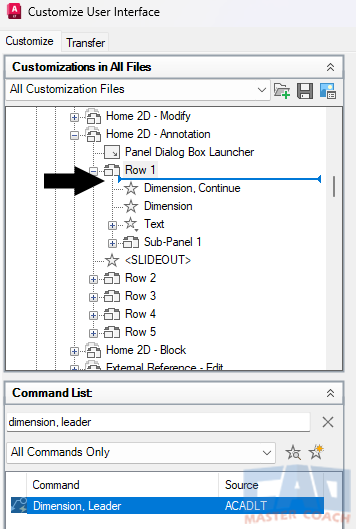
Step 7. Select Button Style
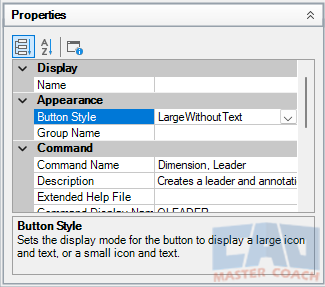
With the newly placed Dimension, Leader command selected in the Customization in All Files section, select the desired button style from the following choices in the pull-down menu:
- Large with Text (Vertical)
- Large with Text (Horizontal)
- Small With Text
- Small Without Text
- Large Without Text
In the image below, Large Without Text is selected.
Step 8. Verify Changes In The Panel Preview Section
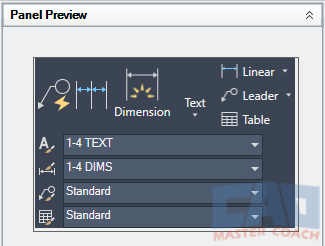
Step 9. Press OK
Press Apply and/or OK to implement the changes to the Ribbon and verify the changes are made. In the image below, the Qleader button is at the left side of the Annotation Panel in the Home Ribbon.


