Rectang
AutoCAD RECTANG Command
COMMAND LINE: RECTANG

DEFAULT KEYBOARD SHORTCUT: REC
RIBBON: HOME | DRAW TAB | RECTANGLE

How to Use The RECTANG Command
Loading Conversation
Loading Conversation
There are five options with the RECTANG command:
- Chamfer – Places a chamfer at each corner of the rectangle. The same chamfer will be placed at each of the four corners.
- Elevation – Adjust the Z dimension of the rectangle.
- Fillet – Places a fillet at each corner of the rectangle. The same fillet will be placed at each corner of the four corners.
- Thickness – Adjust the thickness, of how tall in the Z dimension the lines that make up the rectangle are.
- Width – Adjust how wide the lines that make up the rectangle are. When making the lines of the rectangle wider, the lines are filled in.
To create a rectangle, initiate the RECTANG command, then select one of the four vertices of the rectangle.

When the first vertex is selected, in addition to being able to select the opposite vertex, three options are presented:
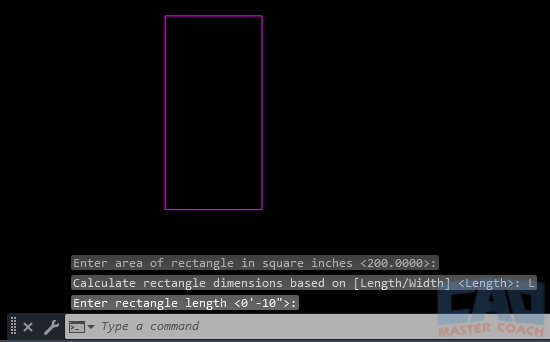
- Area – Area will create a rectangle with the area entered at the command prompt. In addition, the length of one side will need to be entered. In the image below, an area of 200 square inches is entered and the Length is entered as 10 inches. Note that when Length is selected, the horizontal dimension of the rectangle is entered and when Width is selected, the vertical dimension of the rectangle is entered.
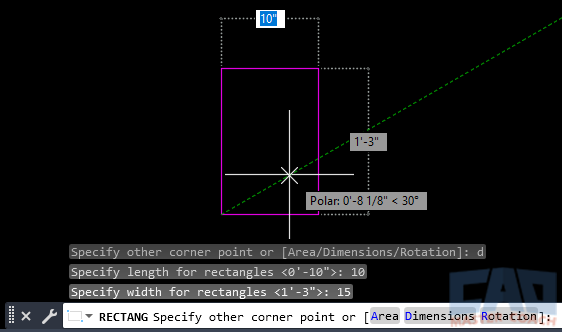
- Dimensions – Dimensions will ask for the Length and the Width of the rectangle being drawn. The first corner is the bottom left of the rectangle. The Length is the horizontal dimension and the Width is the vertical dimension of the rectangle. In the image below, 10 inches is entered as the Length and 15” (1’-3”) is entered as the Width. After the Length and Width are entered, the orientation of the rectangle is selected with the mouse. Moving the mouse to the upper right, upper left, lower left, or lower right quadrants from the first corner will select the orientation of the rectangle. In the image below, the upper right quadrant is being selected.
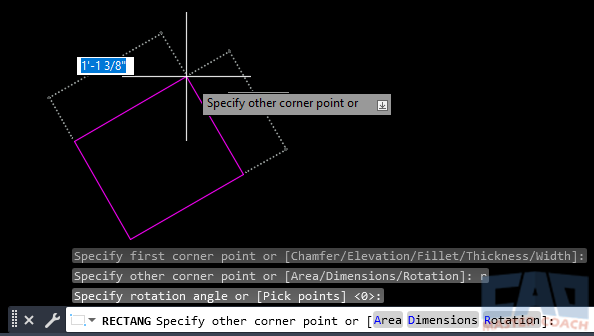
- Rotation – Rotation will draw the rectangle at the chosen angle. When Rotation is selected, select an angle of the base of the rectangle. When an angle is selected, this will be the new default angle all rectangles will drawn at until a new angle is selected. In the image below, the first point of the rectangle is the lower left corner, then Rotation is selected. After selecting the angle, the option to choose Area, Dimensions, or Rotation is presented again.