How to Draw an Arc by Length in AutoCAD (Step-by-Step Guide)
Introduction
Arcs are among the most fundamental objects in AutoCAD. They appear in everything from architectural details to mechanical profiles, piping runs, and civil curves. Most arcs are created by radius or by passing through three points, but what if your design specifies the distance along the curve instead?
In older releases, AutoCAD offered a Start–End–Length option. That workflow no longer exists in AutoCAD 2020 and later. Instead, today’s users rely on indirect but more flexible methods to ensure an arc measures exactly the required length.
This tutorial explains five modern approaches — from simple property editing to parametric constraints — so you can confidently create arcs by length in any version of AutoCAD you’re likely to use today.
Comparison of Arc Creation Methods in AutoCAD
Table: Arc by Radius vs 3-Points vs Length vs Tangent
| Method | How It Works | Best Used For | Limitations | Verification Tools |
|---|---|---|---|---|
| Arc by Radius | Define an arc by start point, end point, and exact radius. | Situations requiring precise radius control, e.g., construction details, mechanical parts, and structural elements. | Requires knowing radius in advance; not ideal for irregular fits. | DIMRADIUS, Properties palette. |
| Arc by 3 Points | Define an arc by picking three points through which the curve passes. | Fitting arcs to geometry, tracing scanned drawings, or survey-based layouts. | Radius is unpredictable; bulge direction depends on pick order. | Properties palette, DIMRADIUS. |
| Arc by Length | Define or adjust an arc so its curved distance matches a required length. | Pipe bends, fabrication cut lengths, road curves specified by arc length. | Old Start–End–Length option deprecated; requires Properties, LENGTHEN, or DIMARC methods. | Properties palette (Arc Length), LIST, DIMARC. |
| Tangent Arc | Begin an arc tangent to an existing line, arc, or polyline, then specify end point. | Smooth transitions, roadway design, mechanical tangents. | Tangency can conflict with geometry if endpoints are misaligned. | DIMRADIUS, Properties palette. |
Why Control Arc Length?
Unlike a chord length (straight line between two points), the arc length measures the distance along the curved path. That number matters in many industries:
- Fabrication and piping: Shop drawings often call out exact bend lengths (e.g., a 500 mm elbow).
- Civil engineering: Road alignments and curve tables specify curves by arc length and degree.
- Mechanical design: Cam profiles, gears, and custom parts require precise arc travel distances.
- Consistency and QA: Matching arcs to spec avoids tolerance issues and site rework.
If your spec sheet says “Arc length = 500 mm”, these methods ensure your geometry matches.
Method 1: Edit Arc Length in Properties (Fastest)
The simplest modern workflow:
- Draw an arc using any method (3-Point, Start–Center–End, etc.).
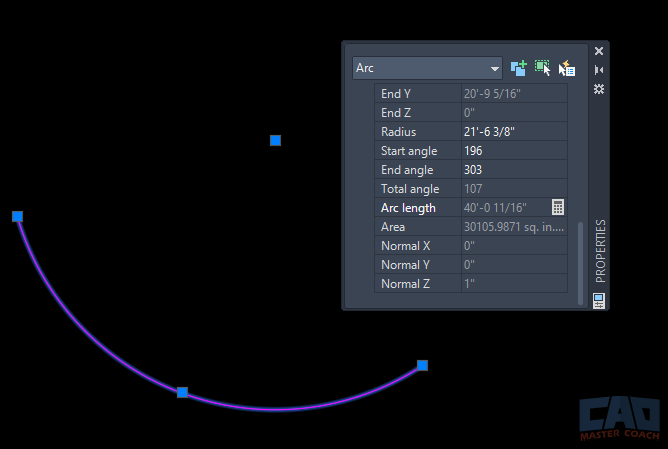
- Select the arc and open the Properties palette (Ctrl+1).
- Locate the Arc Length property.
- Type the required value (e.g., 500). AutoCAD recalculates the radius automatically to satisfy the new length.

AutoCAD Properties palette with Arc Length property highlighted.
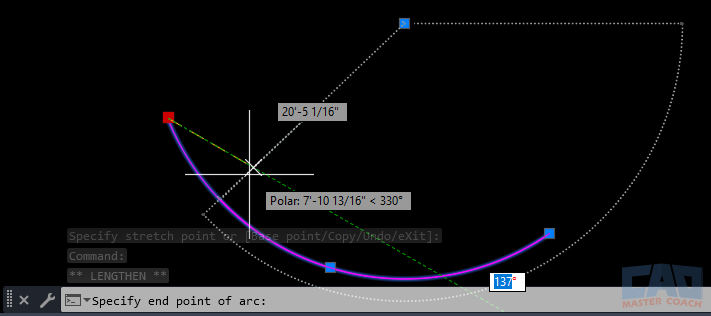
Method 2: Use the LENGTHEN Command
The LENGTHEN (LEN) command lets you modify an object to a total length, including arcs.
- Draw a rough arc.
- Type LEN
- Choose the Total Length option.
- Type the required arc length.
- Click the arc.

AutoCAD LENGTHEN command adjusting an arc to a total arc length.
AutoCAD trims or extends the arc until its curved length matches the value you entered.
Use case: When you don’t care about exact radius but you need the arc to be exactly 500 units long.
Method 3: Interactive Control with Dynamic Input
Dynamic Input (F12) provides a more visual method:
- Turn on Dynamic Input (F12).
- Start drawing an arc (e.g., 3-Point).
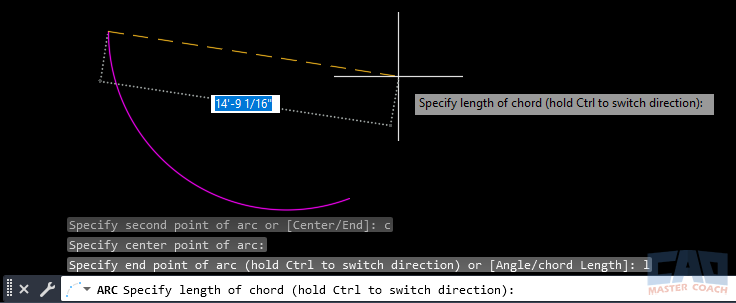
- Watch the Arc Length field appear in the input tooltip near your cursor.
- As you hover for the final pick, type the exact arc length.
- Press Enter to lock it in.

Dynamic Input tooltip showing Arc Length field while drawing an arc.
This gives you a live preview of curvature while ensuring the final arc length matches your number.
Method 4: Parametric Constraints for Repeatability
For designs that require consistent, reusable arc lengths (pipe bends, fabrication blocks):
- Draw an arc.
- Open the Parametric tab → Parameters Manager.
- Create a User Parameter (e.g., ArcLen = 500).
- Constrain the arc’s Arc Length property to ArcLen.
Now, the arc flexes if endpoints move, but its arc length remains locked. This is ideal for template drawings or reusable blocks.
Method 5: Dimension-Driven with DIMARC
Sometimes it’s best to let the dimension itself drive the geometry.
- Draw an approximate arc.
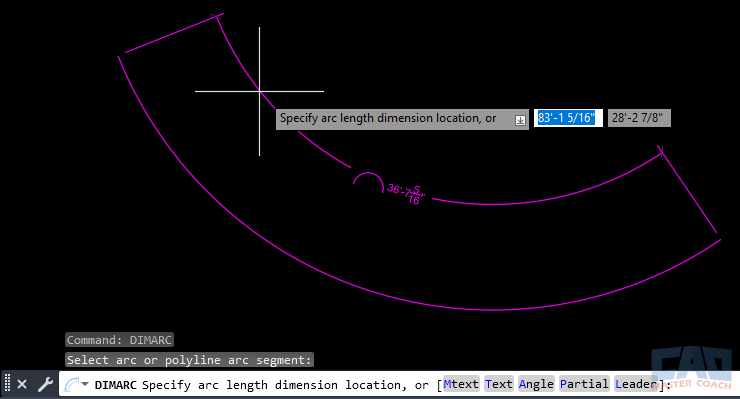
- Place an Arc Length Dimension using DIMARC.
- In the Properties palette, lock or constrain that dimension.
- Enter the required arc length.

Arc length dimension applied with DIMARC in AutoCAD.
The arc adjusts until the dimension matches your input. This is useful in annotated drawings where the dimension callout needs to stay authoritative.
Verifying the Arc Length
No matter which method you choose, always verify:
- LIST Command: Displays arc properties, including length.
- Properties palette: Arc Length field confirms current value.
- DIMARC annotation: Provides visible confirmation on plotted sheets.
Common Mistakes to Avoid
- Arc won’t accept the value: The chord is too short for the requested length. Move endpoints or increase length.
- Wrong curve direction: Point pick order controls bulge. Redraw or flip grips.
- Chord vs arc length confusion: Remember, chord is straight, arc length follows the curve.
- Unit mismatch: Verify UNITS settings before entering specs.
Pro Tips
- Pair LENGTHEN with grips for fast adjustments in iterative design.
- Store common arc lengths as blocks with parameters.
- Use constraints in civil design to keep road curves aligned with survey data.
- Always label arcs with DIMARC if length is the governing factor — don’t rely solely on radius.
Real-World Example: 500 mm Pipe Bend
- Draw a 3-Point arc between two fitting endpoints.
- Open Properties → Arc Length = 500.
- Verify with DIMARC annotation.
- Save as a reusable block for consistent bends throughout the drawing.


